Lesson 2 (Beta)

What Is Authentication and Why Do We Need It?
About This Lesson:
Lesson 2 focuses on the role of user identification and authentication in keeping systems secure.
Intended Audience: High school students or early undergraduates. Geared towards AP Computer Science Principles, but compatible with any introductory computer science course.
Delivery Format: Traditional classroom.
Duration for Whole Lesson: 75 minutes (with options to shorten or lengthen).
Lesson Rationale
A critical part of managing security is controlling who is able to do what. As we learned in Lesson 1, cybersecurity is the practice of preventing and mitigating attacks on computer systems and networks. The goal of a cyber attack is to get a system to do something that it shouldn’t do, do a typical task for the wrong person, or block a legitimate user from completing their task. In order to ensure that the system only does the intended work for the intended user, we must have a way of identifying each user, and a process for authenticating each person who claims to be a legitimate user.
There are many real world examples where we authenticate in various ways. Some systems are designed so that anyone who can prove they meet a certain requirement is able to complete the task. Anyone seventeen or over can buy a ticket to an R-rated movie; anyone who’s currently a student can get student discounts. Other tasks require that you prove you’re a particular person before you can proceed. At a TSA checkpoint at the airport, you have to show an ID card that matches the name on the boarding pass; when you take the SATs you have to show an ID card that matches the name registered to take the exam. In the real world, your passport, driver’s license, or state ID card are typically used for authentication, but in the online world we have to prove who we are in different ways.
Learning Objectives
After completing this lesson:
- Students can explain what it means to verify someone’s identity and compare how verification works in different situations.
- Students can express why authentication is important in cybersecurity.
- Students can describe how and why a username and password combination is used for authentication.
- Students can summarize some high-level weaknesses to using shared secrets to authenticate to a website or computer.
- Students can identify good password practices on the user side and the system side, and discuss the costs of implementing them.
Key Terms
Identification is the ability to identify uniquely a user of a system or an application that is running in the system.
Authentication is the ability to prove that a user or application is genuinely who that person claims to be, or what that application claims to be.
For example, consider a user who logs on to a system by entering a user ID and password. The system uses the user ID to identify the user. The system authenticates the user when they sign in by checking that the password they enter matches the stored password for that username.
Alignment with AP Computer Science Principles -- SY 2020--21 Onward
This lesson addresses standards laid out in the AP Computer Science Principles Framework for 2020–21, Fall 2019 version.
Supports the following Learning Objectives under Big Idea 5, Impact of Computing:
LO IOC-2.A Describe the risks to privacy from collecting and storing personal data on a computer system. Essential Knowledge points covered:
- EK IOC-2.A.9 PII stored online can be used to simplify making online purchases.
LO IOC-2.B Explain how computing resources can be protected and can be misused. Essential Knowledge points covered:
- EK IOC-2.B.1 Authentication measures protect devices and information from unauthorized access. Examples of authentication measures include strong passwords and multifactor authentication.
- EK IOC-2.B.2 A strong password is something that is easy for a user to remember but would be difficult for someone else to guess based on knowledge of that user.
- EK IOC-2.B.3 Multifactor authentication is a method of computer access control in which a user is only granted access after successfully presenting several separate pieces of evidence to an authentication mechanism, typically in at least two of the following categories: knowledge (something they know); possession (something they have), and inherence (something they are).
- EK IOC-2.B.4 Multifactor authentication requires at least two steps to unlock protected information; each step adds a new layer of security that must be broken to gain unauthorized access.
LO IOC-2.C Explain how unauthorized access to computing resources is gained.
Also touches on the following Essential Knowledge:
Under Big Idea 3, Algorithms and Programming:
- EK AAP-3.F.1 Simulations are abstractions of more complex objects or phenomena for a specific purpose.
- EK AAP-3.F.4 The process of developing an abstract simulation involves removing specific details or simplifying functionality.
Under Big Idea 4, Computing Systems and Networks:
- EK CSN-1.A.3 A computer network is a group of interconnected computing devices capable of sending or receiving data.
Under Big Idea 5, Impact of Computing:
- EK IOC-1.A.1 People create computing innovations.
- EK IOC-1.A.2 The way people complete tasks often changes to incorporate new computing innovations.
- EK IOC-1.A.3 Not every effect of a computing innovation is anticipated in advance.
- EK IOC-1.A.4 A single effect can be viewed as both beneficial and harmful by different people, or even by the same person.
- EK IOC-1.B.1Computing innovations can be used in ways that their creators had not originally intended.
- EK IOC-1.B.3 Responsible programmers try to consider the unintended ways their computing innovations can be used and the potential beneficial and harmful effects of these new uses.
- EK IOC-1.B.4 It is not possible for a programmer to consider all the ways a computing innovation can be used.
- EK IOC-1.F.11 Computing innovations can raise legal and ethical concerns.
- EK IOC-2.A.1 Personally identifiable information (PII) is information about an individual that identifies, links, relates, or describes them.
- EK IOC-2.A.5 Technology enables the collection, use, and exploitation of information about, by, and for individuals, groups, and institutions.
- EK IOC-2.A.11 Information placed online can be used in ways that were not intended and that may have a harmful impact. For example, an email message may be forwarded, tweets can be retweeted, and social media posts can be viewed by potential employers.
- EK IOC-2.A.12 PII can be used to stalk or steal the identity of a person or to aid in the planning of other criminal acts.
- EK IOC-2.A.15 Information posted to social media services can be used by others. Combining information posted on social media and other sources can be used to deduce private information about you.
- EK IOC-2.B.6 Certificate authorities issue digital certificates that validate the ownership of encryption keys used in secure communications and are based on a trust model.
- EK IOC-2.C.3 Data sent over public networks can be intercepted, analyzed, and modified. One way that this can happen is through a rogue access point.
Provides opportunities to use the following Computational Thinking Practices:
P1 Computational Solution Design: Design and evaluate computational solutions for a purpose.
- P1.A Investigate the situation, context or task.
- P1.D Evaluate solution options.
P3 Abstraction in Program Development: Develop programs that incorporate abstractions.
- P3.B Use abstraction to manage complexity in a program.
P4 Code Analysis: Evaluate and test algorithms and programs.
- P4.C Identify and correct errors in algorithms and programs, including error discovery through testing.
P5 Computing Innovations: Investigate computing innovations.
- P5.A Explain how computing systems work.
- P5.C Describe the impact of a computing innovation.
- P5.D Describe the impact of gathering data.
P6 Responsible Computing: Contribute to an inclusive, safe, collaborative, and ethical computing culture.
- P6.A Collaborate in the development of solutions.
- P6.B Use safe and secure methods when using computing devices.
Cybersecurity Ethics Agreement
Some activities in this lesson involve learning skills that could be used to attack networked systems. Before beginning your cybersecurity unit, we recommend you ask students to sign an agreement such as the one below. The agreement commits them to use their powers only for good, and lays out some specifics of what that means.
Download Agreement: "Cybersecurity Ethics Agreement"
Be sure to give students plenty of time to read through the agreement (emphasize that this isn't a click-through yeah-sure-whatever terms of service agreement!) and invite them to ask questions if anything is unclear. Give them a copy to sign and a copy to keep.
- Check your district's policies to see whether students will need to have their parents sign the agreement as well.
Credits: Inspiration for the points to cover in this agreement came from Avi Rubin, Michael E. Whitman and Herbert J. Mattord (the Hands-On Information Security Lab Manual), an anonymous CS teacher from a Facebook group, and EC-Council’s Code of Ethics.
“Engage” Activities:
Introduce the topic, probe prior knowledge, and ignite students’ interest. (Choose one Engage activity, or use more if you have time.)
Quick Thought Exercise: Classroom vs. DMV
Estimated Time: 5-10 minutes.
What You’ll Need: Blackboard/whiteboard (optional).
Recommended Prep: Look up the driver’s license/state ID requirements for your home state.
Description: In a brief discussion, students compare proving your identity to your classroom teacher with proving your identity at the DMV.
Ask: On the first day of school when your new teachers are taking attendance, how do they know that you’re the student that you claim to be? What do you do to prove your identity?
Possible Answers Include:
- You don’t (usually) have to prove it, you just say ‘Here’ when your name is called.
- The teacher usually believes that you are who you say you are, because why would you come there to pretend to be someone else?
- The teacher knows it (probably) wouldn’t work to pretend to be someone else, because the person you were pretending to be would be in the room and would speak up. (Unless they were in on it.)
- If anyone in class knew you from a previous class, they could speak up and ruin it.
- The teacher knows that, if you’re on the attendance list, your parents had to show your birth certificate or some other identifying document when they first registered you for school. The teacher just has to match the list to the people in the room.
Ask: What about when you go to get a driver’s license or your first state ID card? What do you have to do to prove your identity?
Possible Answers Include (depending on your state):
- Prove your name/match your name with a picture: U.S. birth certificate, U.S. passport, non-U.S. passport with a valid visa, green card, citizenship papers.
- Prove you’re in the U.S. legally: Mostly the same as identity.
- Prove you have a social security number: Social security card.
- Prove you live in your state: Bills or government documents with your name and address on them. (Or if you’re a minor, with a parent’s name and address.)
You may need to clarify: REAL ID is a federal law about proving your identity before you can board plane flights or enter military bases (starting in 2020). The REAL ID is the same as a state-issued driver’s license or state ID, but with a special stamp that certifies you’ve shown some extra documents (that your state may or may not require for a regular driver’s license/state ID).
Caveat: The point here is not whether students can correctly list the necessary documents, but to get them thinking about documentation.
Ask: Why are the requirements for proving who you are to get a driver’s license so different from proving who you are on the first day of class?
Possible Answers Include:
- A teacher has a list of twenty or thirty names, and the owners of the names are (usually) all in the room. There are thousands or millions of people in your state (some with duplicate names), and the DMV doesn’t even have a list of all of them. They all come to the DMV at different times. So it would be much easier to lie.
- A driver’s license is the first photo ID most people get, and then it’s used as the basis for getting other types of IDs, so it’s important to get it right.
- Once you have a state-issued driver’s license, you can rely on that picture ID for many purposes for the rest of your life — a lot more than just proving you can drive a car legally. (Voting, cashing a check, applying for government benefits, boarding a plane…) Convincing a teacher of your identity just means you get to keep going to that class.
Opening Discussion: Offline Authentication
Estimated Time: 7 minutes.
What You’ll Need: Blackboard/whiteboard (optional).
Description: In this brief exercise, students identify an offline situation where they need to prove who they are and break down some of the elements in that process.
Options:
- Break students up into small groups, then have each group identify a situation and answer the questions.
- Keep the class together. Ask them to brainstorm some situations, then pick one or two examples for the follow-up.
Running the Discussion:
- Break into small groups, if relevant.
- Ask students to brainstorm (a) situation(s):
- Think of a situation where you have to prove who you are before you’re able to do something. Or maybe a time where you need to be a certain age, go to a certain school, be a member of a certain group, or live in a certain neighborhood or zip code.
- Have students answer each of the following questions for the situation in question:
- Who’s asking, or who needs to know?
- Why do they need to know?
- What aspect of your identity do they need to verify? (For example, your name, age, residence, eligibility, certifications…?)
- What evidence are they willing to accept?
- Do you have a backup alternative if you can’t provide the evidence they ask for?
- If students are having trouble coming up with an example, prompt for:
- Are there situations where you have to be a certain age to buy or do something? (See an R-rated movie at a theater, drive a car, vote in an election, etc.)
- Are there times you have to show your student ID to do something? (Buy tickets to a school dance, get into a football game, etc.)
- What about things your parents need to show ID to do?
Higher-Level Ideas That May Emerge:
- It’s really common to restrict who can do a thing based on characteristics like age, address, or membership in a group. But whoever’s in charge needs to have a way to know whether people have those characteristics.
- Different situations will have different criteria for how you can prove you’re eligible, and there may be different options for exceptions.
- Some requirements are narrower and less flexible than others.
Computing in the News - Cybersecurity Edition
View Outline: “Computing in the News – Cybersecurity Edition”
Coming Soon: Specific questions and example articles for Lesson 2, without having to go off-page.
“Explore” Activities:
Ground students’ learning in firsthand experience and spark new ideas.
Authentication in Online Shopping, Option 1: Small-Group Activity
Estimated Time: 15 minutes.
What You’ll Need:
- Copies of the “Authentication in Online Shopping” worksheet, or blank paper for sketching.
- Projector and a laptop/computer for the teacher (optional).
- Student computers or tablets that can access Amazon.com (optional).
Description: We take for granted the amount of trust that is needed to buy something online. In this activity, you will highlight the ways that authentication comes up when you buy something from Amazon.com, including with third party sales and customer reviews.
Option 1 for this activity is intended for students who know a little bit about websites and web browsers, or have experience with online shopping, or for a group of students who are ready for the challenge of a freeform activity.
Sub-Options:
- Unplugged: Students recall or imagine making a purchase on Amazon.com
- Connected: Students use computers or tablets to visit Amazon.com
Download Worksheet: “Authentication in Online Shopping”
Running the Activity:
- Introduce the activity: We’re going to talk about one of the most popular online activities.
- Ask the (whole) class:
- How many of you have bought something online?
- Which website or app did you buy it from?
- What is Amazon.com?
- Clarify if necessary: Amazon is a website that sells things directly to customers, and it’s also a third party-marketplace, meaning that other vendors can use it to sell things to Amazon customers.
- Break class into groups and give overview:
- Unplugged option: In your groups, imagine you’re sitting down on a laptop or computer at home and you’re going to buy a book from Amazon.com.
- Connected option: In your groups, you’re going to talk about the process of buying a book from Amazon.com. You can go on your computers to remind you how the site works, but focus on thinking about details that are important for authentication.
- Questions they’ll explore:
- What happens when you visit Amazon?
- What steps might you take to choose a book, and to decide whether to buy it from Amazon itself or from another company that sells products on the Amazon site?
- How and when do questions about authentication or identity come up?
- Pass out worksheets and give instructions:
- On the worksheet, write or sketch the steps involved and mark/highlight the parts where identity and authentication matter.
- Take about ten minutes to do this. I’ll walk around and see how everyone is doing.
- Any questions before we get started?
- Prompt students to think about as they do the exercise:
- What are the times when it’s important to be sure you’re interacting with the party you think you are?
- What signals and indicators are available to you to verify the other party’s identity?
- What could go wrong with those indicators?
- After ten minutes, bring the class back together.
- Ask one of the groups what’s the first step in buying the book, then go through the groups in turn asking for the next step. (Ask for suggestions from groups out of order if the current group is unsure.)
- After a group describes a step, ask them who’s involved and how each party verifies the other identity.
Target answers (in some order) and example follow-up prompts about verification:
- I use a web browser to go to Amazon.com. / I open the Amazon app.
- How do you know you’ve connected to the right Amazon.com?
- I log in to my Amazon account.
- How does Amazon know the username or email I enter belongs to me?
- Why do you have to have a username?
- What’s the point of creating a password?
- I search to see if Amazon has the book I’m interested in.
- How do when I’ve found the book I’m looking for?
- What about if I’m buying it from a different seller, how do I know they’re a real bookseller that won’t cheat me?
- I can read reviews, check the price, and get an estimate for shipping.
- How do I know that the customer reviews are authentic?
- I select a book, put it in my cart, and go to check out.
- I enter a shipping address and payment information.
- How does Amazon know I have permission to use the credit card number I entered?
- How does Amazon know I have permission to receive packages at the address I entered?
- Amazon charges me for the book.
- Amazon packages the book and mails it to the address I provided.
- How does Amazon know they’re shipping to a valid address?
- The mail carrier or delivery service delivers the book to my address.
- How do I know the package I’m about to open is from Amazon?
Authentication in Online Shopping, Option 2: Whole-Class Activity (Teacher-Led)
Estimated Time: 15 minutes.
What You’ll Need:
- Projector and a laptop/computer that can access Amazon.com, for the teacher (make sure you’re logged out of Amazon before starting).
- Copies of the “Authentication in Online Shopping” worksheet, or blank paper for sketching (optional).
Description: We take for granted the amount of trust that is needed to buy something online. In this activity, you will highlight the ways that authentication comes up when you buy something from Amazon.com, including with third party sales and customer reviews.
Option 2 for this activity is intended for students with less experience with the Internet and how online shopping might work. You could also choose Option 2 if you’re short on time or don’t have (unblocked) student computers.
Download Optional Worksheet: “Authentication in Online Shopping”
Running the Activity:
- Introduce the activity: We’re going to talk about one of the most popular online activities.
- Ask the (whole) class:
- How many of you have bought something online?
- Which website or app did you buy it from?
- What is Amazon.com? What can you do on that site?
- You may need to clarify: Amazon is a website that sells things directly to customers, and it’s also a third party-marketplace, meaning that other vendors can use it to sell things to Amazon customers.
- Pass out worksheets (if you’re using them) and give instructions:
- We’re going to walk through buying something on Amazon step-by-step, and talk about how and when questions about identity and authentication come up.
- Sketch out the steps on the worksheet as we go.
- Prompt students to think about as you’re doing the exercise:
- What are the times when it’s important to be sure you’re interacting with the party you think you are?
- What signals and indicators are available to you to verify the other party’s identity?
- What could go wrong with those indicators?
- Demonstrate navigating to the website:
- Ask: What do we do first when we want to buy something online?
- Narrate: We’re using a web browser so we’ll go straight to the website. Maybe you’ve shopped on Amazon using the mobile app, which is a little different.
- Type Amazon.com directly into the URL bar. Before hitting enter, read it back to yourself out loud to check for typos.
- Ask: How do I know that I’m on the right Amazon? That I didn’t accidentally go to a fake online store pretending to be Amazon?
- Explain (if necessary):
- I typed in Amazon.com, I didn’t click on any links, and I double checked that there aren’t any typos.
- I could also click on the info icon in the address bar to view the “digital certificate”.
- We’re not going to talk about the details of digital certificates today; we’ll cover that in a later lesson. For today, you should know that they are used to verify the identity of a website online.
- Now I’ve checked that I’m on Amazon.com, so I know that I’m talking to Amazon.
- Talk about the login process:
- Ask: How does Amazon know who they’re talking to? How do they know whether I’ve bought something on Amazon before?
- Explain (if necessary): When you interact with a website, you can create an account that has a username and a password. The username is the string of characters the website knows you by. Sometimes that’s an email address and sometimes it’s a name that you’ve made up.
- Ask: Why do you have to have a username?
- Explain (if necessary): We can’t use our name like in the real world because that’s often not unique. Your username has to be unique.
- Ask: What’s the point of creating a password?
- Explain (if necessary): Amazon is going to store information about you that’s linked to your username. When you visit Amazon.com, it will bring up details about your past interactions and show them to you: what you’ve searched for, what you bought, your addresses, your credit cards. Amazon needs a way to make sure they only show that information to the right person. A password is a shared secret between you and Amazon. Amazon assumes that anyone who knows that password is authorized to get the information stored with the username.
- Ask: How can you tell whether you’re signed in to an account?
 Explain (if necessary): You can tell you’re signed in to an account if the menu on the upper right says “Hello, NAME”. Amazon doesn’t know my name because I’m not signed in to an account right now. If I was, it would say my name.
 - Hover over “Hello, Sign in” and click on the button to show the username and password field. You might have to click on “Add an account” to see the form.
- Narrate: I’m not going to sign in for this activity, but if I did, we would see suggested products related to my past purchases, and all the other information associated with my account.
 Search for a password journal:
- Narrate: Let’s continue with our shopping task: finding a journal for keeping track of our passwords.
- Search for password journal.
- Explain:
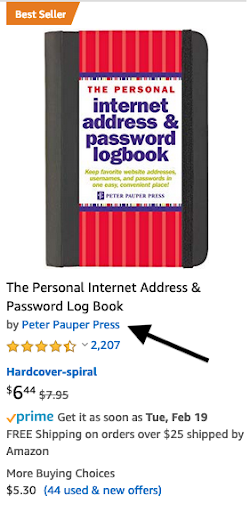
- A lot of the products on Amazon are made by or sold by another company. Those companies work with Amazon to reach customers. Each of the listings has a field under the product name with that company name. Depending on what you’re buying, you might check which company made the item to be sure it’s the one you’re looking for.
- As well as selling and shipping you products made by other companies, Amazon allows companies to sell products on its website that don’t go through Amazon’s warehouses at all; they’re shipped by the other seller
 Examine a listing:
- Click one of the results that isn’t sold by Amazon (anything that doesn’t have the Prime logo underneath the picture).
- Narrate:
- You can click on the link and check out the details, but we’re trusting Amazon to verify the identity of the company and work with reputable companies that won’t cheat you.
- On Amazon, you can read reviews written by people who bought the item.
- Click on the “customer reviews” link to jump down to the reviews, or scroll down the item page.
- Narrate: Each of the reviews shows the username of the person who wrote it. Genuine reviews written by people who actually bought the item for their own use are the most important. You don’t want to read reviews from someone who was paid to purchase the item and write a review, or from the seller’s mom.
- Ask: How do you know whether a review is honest?
- Explain (if necessary): Unlike in-person interactions, you don’t know this person and you can’t see them, so you have to use other signals to decide if they’re trustworthy. On Amazon, you can click on the username to see more information about the person and read their other reviews.
- Talk about the checkout process:
- Add the item to your cart and click the cart icon to check out.
- Narrate: To finally buy this journal, we’re going to enter a shipping address and credit card information to pay for it.
- (Optional) Do an image search for “credit card cvv” to show the students a picture of the front and back of a credit card, highlighting each of the fields (credit card number, expiration date, and CVV verification code).
- Ask: How does Amazon know I’m giving them a real credit card number?
- Explain (if necessary): When I buy something online, the website checks with the credit card issuer (Visa, Mastercard, etc.) that the credit card number, the expiration date, and the CVV all match a credit card that actually exists and belongs to one of their customers.
- Ask: Does that mean Amazon knows it’s my credit card? What about when I buy something in person, does the cashier know it’s my card?
- Explain (if necessary): When you buy something in person, the cashier can:
- Ask for your ID card to verify your name and photo
- Look at the credit card and compare your signature with the signature on the card
- Ask you to enter a PIN
- …though they don’t necessarily actually do those things.
- Wrap up: But assuming the website is able to verify all my information, I’ve successfully bought a new password journal from Amazon!
“Explain” Activities:
Introduce important facts and underlying concepts.
Slide Deck: Authentication and Passwords
Estimated Time: 10 minutes.
What You’ll Need: Computer and projector.
Description: In this presentation, students learn about how authentication is important to cybersecurity and what the general approaches are. They then consider some of the drawbacks to passwords (the most common type of authentication) and begin thinking about approaches to managing them.
Access Slide Deck: “Authentication and Passwords”
Contents:
- Defines authentication, slide 2
- Situates authentication within the cybersecurity field, slides 3–4
- Overview of authentication types, slides 5–7
- Discusses passwords, their drawbacks, and potential management strategies, slides 8–12
Use the custom Graphic Organizer to help students follow along and take notes.
Access Worksheet: Graphic Organizer for “Authentication and Passwords” Presentation
“Elaborate” Activities:
Go deeper into the underlying concepts and/or let students practice important cybersecurity skills. (Choose one Elaborate activity, or use more if you have time.)
Small-Group or Individual Activity: Threat Modeling Online Banking Authentication
Estimated Time: 15-20 minutes
What You’ll Need:
- Copies of the “Threat Modeling Online Banking Authentication” worksheet
- Computer and projector (optional)
Description: Students apply the threat modeling approach they learned in Lesson 1 to identifying potential weaknesses in password-based online banking authentication.
Prerequisite: Lesson 1: The Security Mindset
Download Worksheet: “Threat Modeling Online Banking Authentication”
Access Optional Slide Deck: “Threat Modeling Online Banking Authentication” (Continues from Explain deck.)
Running the Activity:
- Introduce the activity and tie it to the definition of a cyber attack. In this case, students will be trying to protect the system from someone who’s not authorized logging in and making the system do what it’s supposed to do (move money around) for someone it’s not supposed to do that for.
- Pass out worksheets and give students time to read through the steps under “Here’s what’s supposed to happen”.
- Break students into small groups, if relevant (or use as an individual activity).
- Have students jot down notes on page 1 to answer the threat modeling questions introduced in Lesson 1. (Lesson time can be adjusted depending on whether answers and the threat model diagram should be quick notes vs. assessable.)
- Next, students make a diagram on page 2 with their idea of how an online banking system works, and how information flows through it when someone creates and then logs in to an account.
- Students indicate on the diagram what could go wrong in that process, and how attacks could be defended against.
Suggested nudges if students are having trouble thinking about what could go wrong:
- Who could pretend to be the customer?
- At what steps in the process could someone pretend to be the customer?
- What information would they need? How could they get that information?
- Would they need physical access to the customer’s devices? To the bank’s servers?
- If they couldn’t get the information, could they guess it?
- What would be the goal of pretending to be the customer? What could they do?
- Could someone pretend to be the bank? How?
- What would be the goal of pretending to be the bank?
- Is there a way someone could fool the system into moving money out of a customer’s account without pretending to be that customer? What information would they need?
- Bring the class back together and ask:
- What are the weaknesses in this type of system? (Not just the example you’ve diagrammed, but any system that uses a username-password structure for authentication.)
- Do you think it’s possible to fix those weaknesses?
Key weaknesses that may come up:
- The user could choose a password that is easy to guess.
- The user could reuse a password from another account.
- The password can be used by anyone who knows it (so if you can steal the password, you can steal the account).
- Both the bank and the user have to protect the password.
- The user is responsible for some aspects of security, but they’re not necessarily things most people know how to do (choosing and remembering a good password), or they’re things it’s really hard for anyone to do when they’re not thinking about it (be alert for phishing).
- There has to be a way to quickly make the account usable even if the user forgets the password — i.e., to circumvent the security protections (otherwise it’s not convenient).
Small-Group or Individual Activity: What Makes a Good Password Good(ish)?
Estimated Time: 10-15 minutes
What You’ll Need:
- Copies of the “Building Strong Passwords” worksheet
- Student computers that can access https://cups.cs.cmu.edu/meter/
- Computer and projector for teacher (optional)
Description: In this activity, students think about what makes passwords weak or guessable. Then they practice making strong passwords, using a password meter to test their efforts.
Download Worksheet: “Building Strong Passwords”
Access Optional Slide Deck: “What Makes a Good Password Good(ish)?” (Continues from Explain deck.)
Running the Activity:
- Introduce the activity: Let’s think about this from the hacker’s point of view for a minute.
- Ask the class:
- If you were an attacker and knew someone’s username for their bank account, what would you try to see if you could log in as them? Where would you start?
- What could you do to figure out what passwords they might be likely to use?
- What if you were trying to guess the password for someone you knew nothing about? (For example, if you were writing a program to make a lot of login attempts.)
- Explain: If you’re trying to automate your hacking, you probably don’t want to hunt down information about each specific person to try to figure out their password. You just want to throw a lot of guesses at the login system — starting with some common passwords that lots of people use, or common words or patterns. The drawback to the less targeted approach is that you might get locked out after a certain number of tries.
- Ask the class:
- What can users do to make it harder for hackers to guess or figure out their passwords? In an ideal world, what kinds of passwords would people use?
- Is that what happens? Why not?
- What can online services like banks (or other websites/apps/etc.) do to encourage users to pick strong passwords?
- Pass out worksheets and break students into small groups, if relevant (or use as an individual activity).
- Students complete the worksheet activity:
- Part 1: Students answer questions about password strength and try to construct some strong passwords. (Note: Question 3 on page 1 directs students to fill out part of the chart on page 2, then return to page 1 to answer question 4.)
- Part 2: Students test the passwords they made up in Part 1 using CMU’s password meter and consider the feedback they get.
- Part 3: Students compose advice for others about how to make a strong password.
Caveat: Question 2 on the worksheet asks why banks require that passwords include numbers, letters, and special characters. Students may have trouble with this; after all, is a hacker really more likely to guess LFtKnfTpQCKyfyApdYcrNSHcFYpdZk than KtG;LbUM?4QQnBCU”XAV)Q.%Ng.&(/ ? The answer is, probably not. Those rules are in place so that if people do choose a common password or dictionary word to start with (despite the advice not to), they are at least forced to add a little complexity. (Some sites also make sure the password doesn’t match a common password nor dictionary word, but that’s more difficult.)
“Evaluate” Activities:
Assess students’ understanding of the material and development of new skills.
Assignment: Create a Password PSA
Estimated Time: 30-45 minutes.
What You’ll Need:
- Copies of the “Create a Password PSA” assignment handout
- Student computers with software that can make a flyer/poster and/or a slide presentation
- (Optional) Devices that can capture video
Suggested Preparation: Look up the password policy for your school or district (for whatever system students interact with the most) to make sure it’s findable. (At least by trying to make a new account.)
Description: Students (individuals or groups) create a poster or public service announcement that explains the school’s or district’s password policy and also gives general guidelines for coming up with a good password.
Download Handout: “Create a Password PSA”
Options:
- Print out or screenshot the password policy for your district’s or school’s online systems, or send your students to the URL.
- Leave finding out what the password policy is as a problem-solving exercise for the students (assuming it’s findable).
- If your district/school doesn’t have a policy, either:
- Use another system students might interact with that would be worth making a PSA for (like the public library), or
- Have students create a flyer for the policy they think the school/district should have.
Download Sample Response: “Password PSA (Example Flyer)”
Flyer credits: Password-change form copyright Albemarle High School; screenshots by Teaching Security. Images at the top are public domain.
More for Teachers
Resources and background information to help you brush up on the technical nitty-gritty and be prepared for student questions.